Is there anything that screams “I’m a mopping pro!” more than squeaky-clean floors? I don’t think so.
If you’re looking for the best way to REALLY get your floors clean, chances are you’re fed up with how dirty and dull your floors become shortly after cleaning and you want to know how to mop a floor correctly.
Is it just me, or do you feel like everyone can see whether your floors are clean or dirty!
Mopping a floor is among those must-do tasks that seem straightforward, but one that can leave you doubting your housekeeping skills if the outcome is anything but a sparkling floor.
If I take the time to mop my floor, I want that floor to shine and actually look like I did an amazing (or at least a goodish) job.
It’s a struggle many moms deal with, and I’m here to help bring your mopping woes to an end.
Stay with me as I dig a little deeper into the what’s, why’s, and how’s of mopping — why your floor still appears dirty after cleaning, how often you should clean your floors, what to use to make your floors look almost brand new after every mopping session, and a lot more!
Without further ado, let’s get straight into it.
How Often to Clean a Floor
As moms, the simple fact that you have kids around means you’re likely dealing with dirty, sticky floors almost every other day.
I feel you.
Floor surfaces get dirty pretty quickly, which is why it’s important to sweep and do a quick mop-down of your floors — particularly those with high foot traffic — a few times a week. Including mopping into your cleaning routine should be simple enough. It’s okay to put on a movie or kids show, and put the kids in front of the tv for 15 minutes or so.
When My kids were little, I would run my iRobot, after each meal to clean up the mess the kids made, a handheld vacuum works well too.
When it comes to deep floor cleaning, though, once a week is recommended.
Doing a quick clean-up of your floors a few times a week when you have kids and pets Is important because:
- Your floors have high foot traffic, so dirt, pet hair, and other solid debris will likely accumulate quickly within one week. By the time deep cleaning day arrives, your floors might look like they haven’t encountered a mop in ages.
- Dust and pet hair build-up on your floors translates to many allergens around your house. You can already guess what will remind you that your floors are in need of thorough cleaning — a runny nose and watery eyes!
- Dirt build-up may lead to visible scratches on your floors (especially if you have hardwood floors). As your kids run around stepping on the dirt and debris, this impact might cause tiny scratches on your once scratch-free floors.
Common Mistakes When Mopping Floors
Mopping a floor is pretty easy, they say. All you need is lots of water, a mop, and a generous amount of soap to work magic on your flooring, right? Not so fast.
There are a few common mistakes that most moms make when cleaning their floors. Here are three floor-mopping mistakes that you should avoid:
Mistake #1 The Rinsing Process: Forgetting to Rinse the Mop
As you clean your floor, ensure that you give your mop a good rinse the moment you realize the mop water has become too dirty.
The rinsing process is really important here! It doesn’t matter how hard you wring the mop before wiping down your floor — if the mop water is not clean water, it means your mop head is rinsing in dirty water – not a good thing.
A dirty mop will only smear dirt and grime on your floor as you clean. Your floors will end up with dry, dirty water marks.
I’d recommend rinsing your mop under running water. But if that feels like too much work, ensure you have a rinse bucket filled with clean, warm water so you can rinse as you mop.
I like to use mop heads that are detachable that I can then wash in the washing machine after I finish mopping to ensure they are clean for my next use.
Mistake #2 Using Too Much Soap
What’s that phrase they say about too much of anything?
Sure, clean floors call for a mop and soap. But you must use soap sparingly, lest your soap-dripping mop leaves behind a sticky residue that will give your floors a dull look.
When mopping your floors with dish soap, less is certainly more. Don’t squeeze dollops of dish soap in the water like there’s no tomorrow — a few drops go a long way.
Mistake #3 Forgetting to Check the Mop Pad
Whenever you clean your floors, always pause to confirm your mop pad hasn’t become too dirty. Otherwise, you’ll end up smearing unclean water on an entire floor. If I am using a mop with a pad, and I know my floor is dirty, I will replace the pad at least once.
Don’t hesitate to swap the dirty pad with a clean one before you start mopping another section of your floor. The satisfaction of having an incredibly clean floor will be worth the hassle of changing the mop pad as often as necessary.
How to Mop a Floor
Mopping Tips for Better Results
Sparkling floors don’t just happen. With these three tips, you can make your floor go from “meh” to picture-perfect in no time:
Tip #1 Rinse Your Mop
I’ve said it before, and I’ll say it again — the cleaner your mop is, the cleaner your floors will be.
Don’t forget to rinse your mop and change the water as you mop your floors. You’ll save yourself the frustration of watching your whole floor dry out with ugly streaks of dirty water everywhere.
Tip #2 Be More Efficient
Cleaning your floors can take forever if you pause every so often to wash the dirty mop pad.
That’s why I recommend having a couple of clean mop pads that you can quickly grab when you need to replace the dirty one.
Tip #3 White Glove Test Your Work
What if I told you there’s a way to tell if that section of the floor you’re admiring is indeed as clean as it looks?
I’m talking about the white glove test — professional cleaners use it to gauge a floor’s cleanliness.
It’s pretty simple: Put on a glove and run your finger along the cleaned floor surface.
Don’t have a glove? No problem — a clean white sock will do.
If there’s a spot that’s still dirty, the glove or sock will tell it all. That way, you can mop again to ensure the entire surface is clean.
What Should I Use to Mop My Floors?
Floor cleaning would be less stressful if we had the option of mopping our floors with whichever mop and cleaner we like.
But for the sake of your flooring’s quality, you need to be cautious of the cleaner and equipment you use to keep your floors clean.
What I’m trying to say is every floor type has its cleaning requirements. A hardwood floor takes a completely different plan than, say, a concrete patio or garage floor. Using the wrong mop or cleaning product on your floor will ruin its appearance or make it wear and tear faster.
Here’s a quick overview of the different floors and what you should use to clean them:
- Laminate Floors
For laminate flooring, you want a mop that can be squeezed very dry before mopping. Laminate does not like water or wetness, so using a mop that carries a lot of liquid will lead to a short life for your floor.
Damp mopping with a mop that can be wrung out a lot, or a microfiber mop with a squeezable head is a good choice for this type of flooring. This O’Cedar Wringable Mop and Bucket are a very popular choice for laminates. Just dip the mop in the bucket and then squeeze it into the wringing compartment.
- Hardwood Floors
The best mop to use when cleaning your wood floors is a microfiber mop.
Microfiber mops are ideal for damp mopping, which is a great thing since water is hardwood flooring’s worst enemy. Unlike string mops, microfiber mops won’t leave excess water on a hardwood floor.
Store-bought acidic cleaners with acidic ingredients like ammonia are a no-no for hardwood floors. The cleaner you use on your wood floors should be mild; that’s why you can never go wrong a cleaning solution made from a few drops of dish soap and plain warm water. Just put it into a spray bottle and you can use just enough.
- Ceramic Tile
If you have ceramic tile floors, a traditional string mop (strip mop), microfiber mop, or steam mop will do the job pretty well.
Sponge mops aren’t recommended for cleaning ceramic tiles. Reason? They’re notorious for pushing dirty water to the tile’s grout lines.
You can use soapy water (adding a dash of mild dish soap in warm or hot water) to clean your ceramic tile floors. Since this type of floor won’t be hurt by water like hardwood floors, you can keep your mop head fairly wet for cleaning, then wring out completely for picking up the cleaning solution and rinsing.
If you’re in the DIY mood, you can also make your own cleaner by combining white vinegar with water (add dish soap and lemon juice to mask vinegar’s smell on your floors) or mixing rubbing alcohol with water (add soap as well).
- Luxury Vinyl
When cleaning luxury vinyl floors, use a microfiber mop, spin mop, string mop, or sponge mop.
Avoid using a steam mop on any vinyl floor surface since steam can damage the floor (vinyl floors aren’t built to withstand heat).
As for your luxury vinyl flooring cleaner, you can use diluted apple cider vinegar (mixed with soap). If you’d like to disinfect your vinyl floors and remove stubborn spots as you wash, diluted rubbing alcohol is a sure bet.
- Sheet Goods Flooring
You can use a traditional string mop, sponge mop, spray mop, microfiber mop, or spin mop to clean your sheet good flooring — just stay away from steam mops.
As for your cleaning solution, diluted vinegar (mixed with soap) works perfectly. Sheet goods are a very smooth floor, so they are fairly easy to keep clean.
How to Mop Properly
Now that you know the best cleaning solution and the type of mop to use on various floor types, let’s talk about what exactly brought you here — mopping your floors correctly.
Equipment
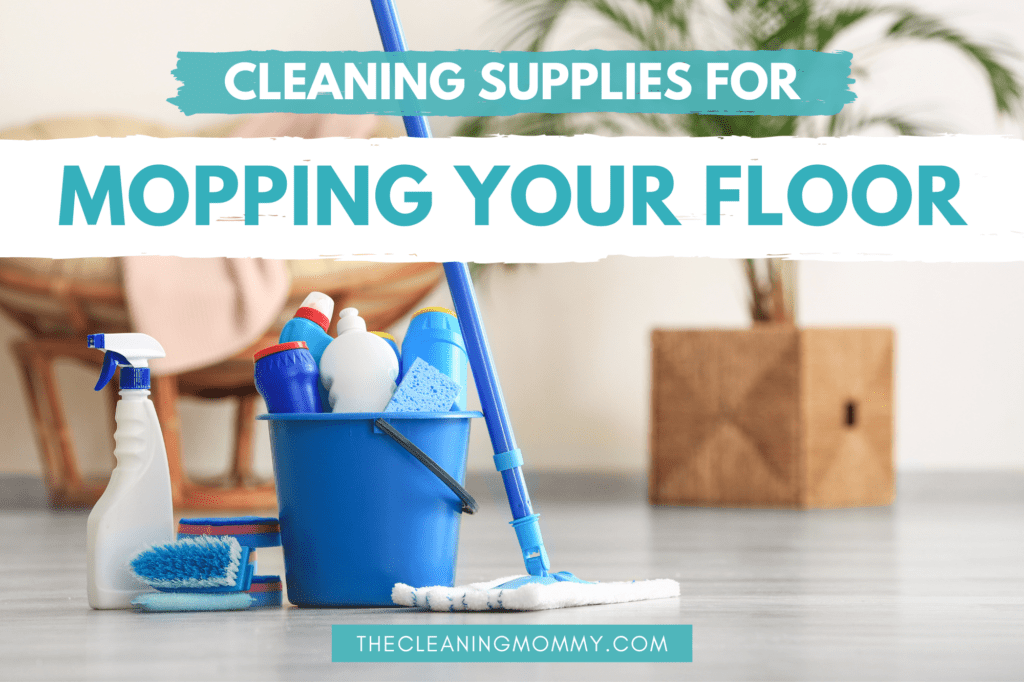
- Mop
- Two buckets (a mop bucket and rinse bucket)
- A vacuum cleaner or broom
- Scrubbing sponge
Instructions
Step #1 Get your cleaning supplies in order
Choose the right mop and cleaning solution based on your floor type.
If you’re using a store-bought floor cleaner rather than a homemade one, make sure it’s designed specifically for your floor type.
Having a rinse bucket — containing clean, warm water (or hot water) — next to you will help you not forget to rinse your mop as you wash.
Step #2 Prepare your floor
Before you start mopping, prepare your floors by sweeping or vacuuming the entire floor to get rid of dirt and other debris. That way, your damp mopping won’t create dirt or dust bunnies mud as you clean.
Also, clear away throw rugs, trash cans, shoes, and other items on your floor so you can mop with ease.
Step #3 Start Mopping
Fill your mop bucket with warm water (mixed with a little dish soap), and begin mopping.
Dunk your clean mop into the soapy water and wring it completely to ensure it’s damp (not soaking wet) as you mop your floors.
A damp mop is the best choice since excess water can damage your floor over time. Plus, your surfaces will take longer than usual to dry up if you use a soaking wet mop.
To avoid stepping on surfaces you’ve just mopped, place your mop bucket and rinse bucket behind you as you clean.
Mop in straight lines if you are using a sponge mop, otherwise mop in a figure 8 motion.
Step #4 Tackle the Tough Stains
While mopping, pay attention to tough or sticky spots on the floor. You can add your homemade cleaner into a spray bottle and use a damp scrubbing sponge to remove these stains.
Step #5 Rinse the Floor Often
After wiping a small section of the floor, remember to dip the mop in fresh water and wipe the surface with the clean mop. Rinsing the floor as you clean will ensure no dirty mop marks appear on the surface.
Step #6 Change Your Mop Water and Rinse Water
Don’t wait for your mop water to resemble hot cocoa for you to replace it. Change it as often as you can.
Also, remember to change your rinse water — don’t rinse your mop head in dirty water.
Step #7 Rinse the Mopped Floors One More Time
Once you’ve tackled every floor surface, do a final overall rinse to remove any cleaning solution residue on the entire floor.
Go over the freshly-cleaned floors with a clean damp mop. If you want your floors to pass the white glove test, don’t skip this step.
Step #8 Give Your Floors Time to Dry
After this final rinse, let your floor air dry completely.
Be sure to let everyone else know they shouldn’t walk on the cleaned floor before it’s completely dry. You wouldn’t want to see all your hard work going to waste.
Also, don’t forget to clean your mop before tossing it in its bucket and taking it to its designated storage area.
It will be easier to start moping right away next time since you won’t waste time cleaning that dirty mop you dumped in the laundry room without rinsing.
When to Get Professional Help?
I don’t know about you, but I tend to think floors are pretty much the face of a home — no matter how tidy the rest of your house looks, a guest will quickly notice that floor surface you haven’t cleaned in days.
And as much as we like seeing our floor surfaces clean, regular mopping is never music to the ears of any busy mom.
We all know how tedious and time-consuming this mopping process can be. If it’s not your sore knees reminding you that you’ve just completed a thorough floor cleaning session, it’s your aching back doing the talking. How frustrating!
Whether you’re struggling to find time to deep clean your floors regularly or feel like every time you mop floors, they end up looking worse than before, consider getting professional help.
You’ll no longer worry about your flooring’s quality deteriorating simply because you can’t find time to do regular cleaning.
Plus, you’ll have time to do a bunch of other fun activities that don’t involve breaking your back to mop floors to perfection!
And did I mention how costly repairing a neglected floor can be? So if you never have time to deep clean, you’d rather call in the pros.
The Proper Way to Mop a Floor: Final Thoughts
If our floors could talk, I bet they’d say they want to sit clean and pretty all day without having to endure pet hair, dirt, food spills, dust, mud, and all that bad stuff.
While there’s little you can do to prevent your floor surfaces from getting dirty in the first place, there is a way to make them look their best at all times — mopping correctly, sticking to a regular cleaning routine, and using cleaning products (and equipment) suited for your floor type.
Cleaning your floors regularly (and correctly) also helps them last longer. If you’re too busy to keep up with a regular cleaning schedule, try professional cleaning services.
Getting your floors cleaned by professionals may sound like an unnecessary expense, but trust me — there’s a much greater price to pay for neglecting your floors.
Other Cleaning Articles You May Like:
- A simple bedroom cleaning checklist that works
- How to clean bath toys
- Cleaning hacks to save time
- How to clean windows without Windex
- How to clean a disgusting bathtub
- Declutter quotes
- How to get motivated to clean
- Just how often do I have to dust my house?
- Best way to clean hardwood floors
- How to remove stains from vinyl flooring

Grainne Foley
Grainne Foley is a wife and mother of 2 great kids. During her 5 years of full time RV travel, Grainne learned to become very efficient at household chores, in order to make time for family adventures. Now, back in a house, she has continued to create tools and techniques to help others lighten the load of household organization and cleaning.
Leave a Reply